Long term thoughts on the Sigma fp L

The Sigma fp L is a strange little camera. Little because it’s barely larger than the the lens mount. Strange because it has a 61MP senso and some significant drawbacksquirks that you have to work around. But maybe that’s part of its charm.

I got it because I was intrigued by the size and the relative affordability it brought to that resolution. I’ve come around to thinking the fp L is the best camera for a certain photographic niche that I find myself in. It has exceptional image quality for lightweight walking/hiking travel, landscape and environmental photography. If you can work around those quirks.

The Teton Range and Jackson Lake in Grand Teton National Park

All the reasons not to own one

The fp L has some significant drawbacks. It only has an electronic shutter, no IBIS, and slow sensor read-out. Combine these with the high sensor resolution and I have to be very careful with shutter speeds to avoid rolling shutter, banding in artificial light, and camera shake. There are situations where these are at odds, and in those, the fp L is not the right camera.

The screen doesn’t articulate in any way. This is somewhat unfortunate for type of photography I do with it where I’m out for a hike or walk without a tripod and might want to get low or high. But I also photo regularly with a Leica Q2 and M10-R, and used an X-Pro2 as my primary camera for many years, so it’s something I know how to work around. Still, there may be photos I don’t take because I don’t want to work the angles with my body.

Its startup time is slow, so it’s less suited for spur-of-the-moment shots than for more considered photos. You might think, you’ll just leave it turned on and asleep, except that battery life is pretty terrible. Third party batteries exist, are cheap, and quite small, and the camera will run and charge the battery from USB-C, so it’s fine I guess to carry a bunch of them. It is clearly a compromise for the size of the camera.

And the size is everything; it makes all of these problems worth overcoming.

The Tetons from Cascade Canyon Trail in Grand Teton National Park

So why would anyone want one?

Why do I own it then? A combination of the small size and sensor. It is perfect when I want to keep size and weight to a minimum, like when hiking. It’s 427g with the battery and SD card. My S1R II is almost twice that at 790g, and they’re both L-mount so any lens I use on either adds the same weight. It is only slightly larger than the body of a Sony RX1 series camera. But it’s not just the camera and lens, it’s what other lenses I don’t have to carry with it.

The Cascade Canyon Trail in Grand Teton National Park

Its 61MP sensor reduces the number of lenses I need to carry. It might even mean I take one prime where I would otherwise have used a zoom. If I carry my 20mm lens, I can get a 35mm field-of-view equivalent crop that is still 34MP. I’ll often go out with just the 20mm lens or just my 35mm lens, and that’s enough for a day’s shooting. No photographer should be afraid of cropping, aggressively if needed, and 61MP gives plenty of room to crop with confidence. When I do take a zoom, like the Sigma 24-70 f/2.8 Art, the fp L with the handgrip is astonishingly comfortable to hold for a tiny rectangular box with a ridiculously oversized lens attached.

There’s one more thing that the fp L does for the occasional landscape photographer in-camera that no other camera does (that I’m aware of). It allows extremely low ISO. You can enable an “ISO Sensitivity Expansion” mode that enables ISO settings from 6-80—that’s 4 stops below the base ISO 100 sensitivity. At ISO 6, if I have a small tripod with me I can take shots I’d ordinarily have to get out an ND filter for. And given how little I want to carry, I don’t usually carry filters.

What about the quirks?

The Cascade Canyon Trail in Grand Teton National Park
On the trail

That’s all well and good, but enabling a lighter weight kit doesn’t overcome the issues I described above:

  1. Rolling shutter,
  2. Banding in artifical light
  3. Camera shake.

Not all of these apply to what I use the fp L for. I don’t use it as a general-purpose camera, and I don’t use it for any fast moving subjects (I have the S1R II for that), so rolling shutter doesn’t bother me (mostly).

The other two are the most common I ran into when I started using the fp L.

I occasionally use it in artifical light, and banding happens at the electrical line frequency. In the US this is 60Hz. I use auto-ISO with the “ISO Sensitivity Expansion” mode turned on, and I have a custom mode that sets a manual 1/125s shutter speed. The Sony sensor’s exceptional high ISO noise performance, and the fact that I’d rather get the shot and worry about noise later, means I don’t really worry about the ISO going up to compensate. At 1/125s I do have to be careful though, because of the other issue: camera shake.

Camera shake is my biggest issue. Most of the time I’m not under artificial light, so I have another custom mode that sets an auto-ISO minimum shutter speed of 1/500s. I have found this gives me a good amount of room for the type of shake I see when hand-holding the camera and lenses I typically use (either the large 24-70 f/2.8 Art or the small 35mm f/2 prime). Again I rely on the sensor’s high ISO performance and let the auto-ISO do what it needs to do to get the exposure correct.

Do I wish this camera had IBIS though? Yes.

If…

If you find you can work around all of these without them getting in your way (and that is a big if), the fp L is worth considering. The combination of such a tiny full-frame interchangable lens camera, a high resolution sensor, and superb image quality makes it a camera I keep reaching for.

The Teton Range from the air

Zen and the Art of Package Maintenance

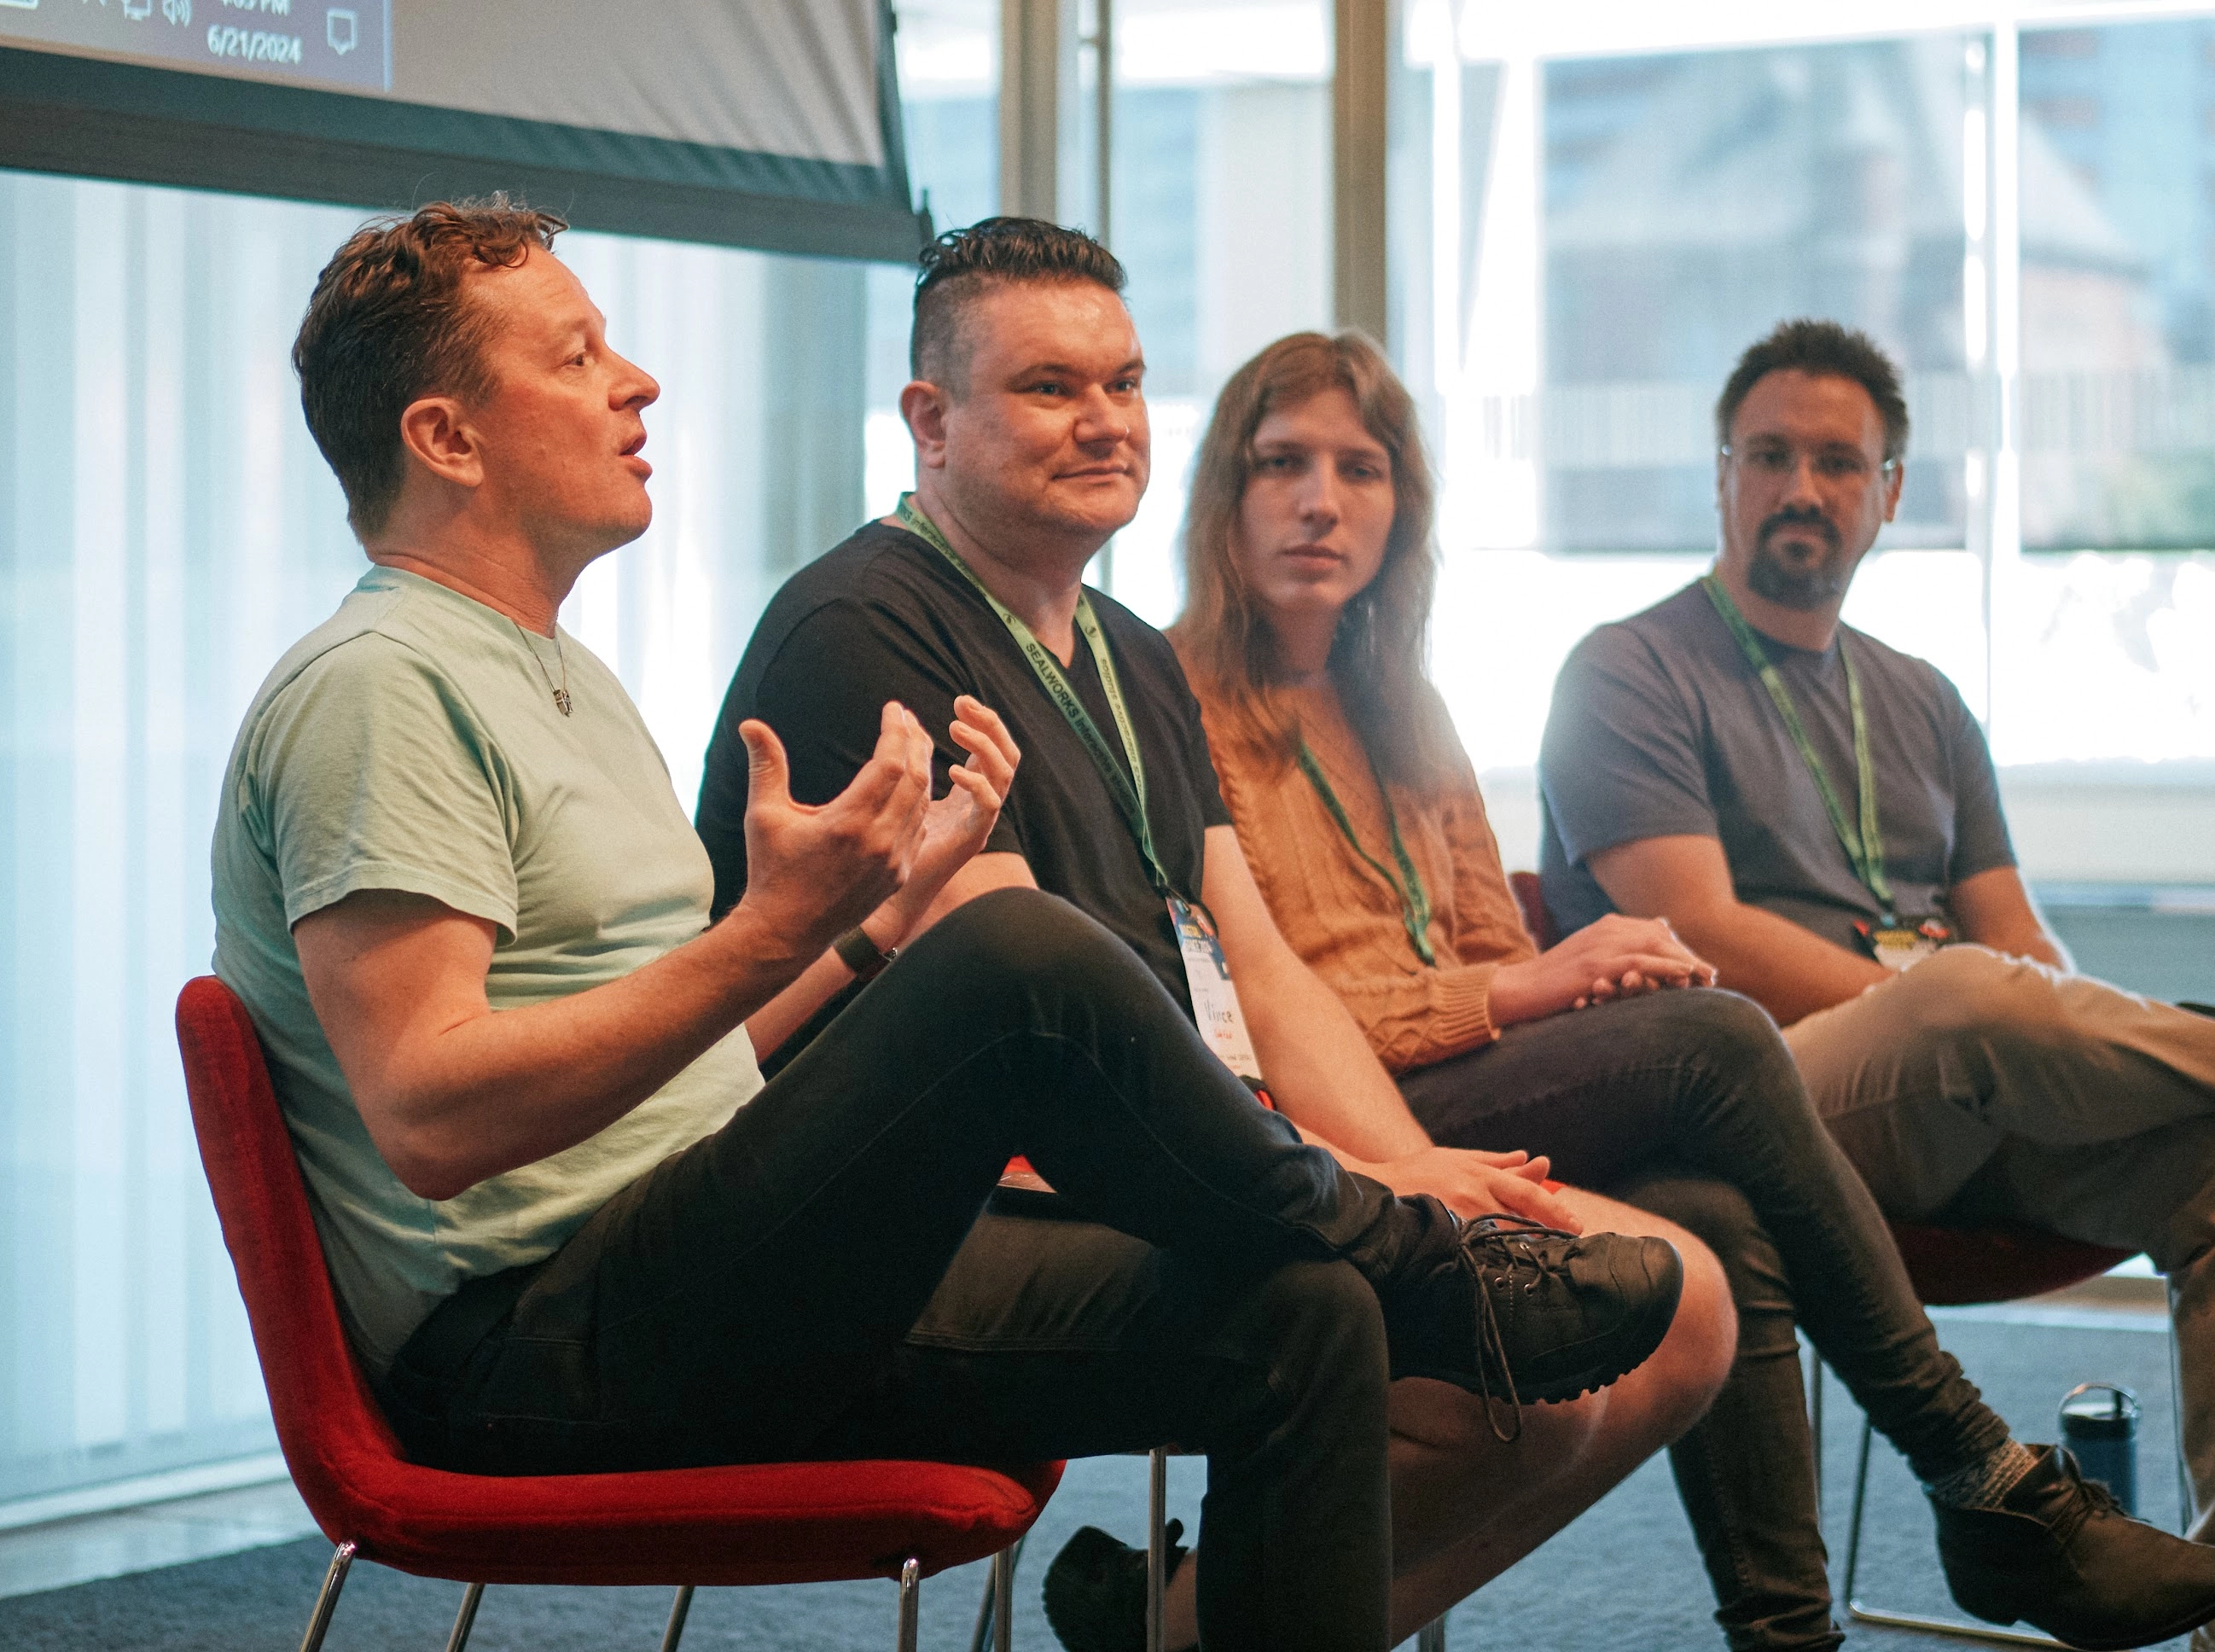
At this year’s Wagtail Space US, a conference dedicated to the Wagtail content management system, my friend Tim Allen hosted a panel on (Wagtail) packages, the challenges of maintaining them, and the small joys of being a maintainer. It was a good discussion, and you should watch the full panel if you’re interested (once it’s posted). I have some reflections on I wanted to write up coming out of it.

A photo of four people, the nearest one speaking
Left to right: Tim Allen, Vince Salvino, Jacob Topp-Mugglestone, Will Barton.
Photo by Tom Dyson

I shared the panel with Vince Salvino of CodeRed and Jacob Topp-Mugglestone of Torchbox in addition to Tim from The Wharton School (and an enduring fixture in the Django and Wagtail communities). Either Tim or Vince made the observation that with the four of us on the panel, the maintainers of the most-used Wagtail packages were all in one place. This speaks to larger growing pains the Wagtail community is having. Each of us have organizations that provide active support for us contributing to Wagtail, maintaining packages, etc. Not everyone is so lucky.

A theme of Wagtail Space 2024 was getting more people involved in the Wagtail community, as users, contributors, and maintainers. Tom Dyson, opening the conference, asked how do we continue to grow? How do we build the community? I think package maintainers have an outsized role in this.

I think there are, generally, two times in which other people will interact with our packages:

  1. When they’re trying it for the first time
  2. When they’re updating it (whether for its own sake or because they have to for a Wagtail update)

Most people find our packages by searching for a solution to a particular problem they’re trying to solving. They encounter our package and it either solves their problem or comes close enough that they can work with it.

In other words, we’re potentially blockers to them getting done what they need to.

There will always be someone who struggles in that moment or maybe has a question, and may file an issue or look us up on the Wagtail Slack. They may even be frustrated because their deadline is dependent on someone else, and who knows how engaged an open source maintainer is at any given time with a library that they haven’t had to touch in a while.

The way we treat people in those moments matters, and a good interaction is some of the best community-building we can engage in.

We can start by having good-enough documentation. Almost all documentation could be better but we can put in the work, talk to our users, and make it as helpful as possible. We can engage with our users in question-answering in the Wagtail Slack, in issues, etc. We can even encourage contributions for features or needs our package doesn’t yet support, but there’s danger here: the stereotypical open source interaction of “it’s open source, go fix it yourself.” Most of us in and around open source have been on the receiving end of this sort of thing at one time or another. It sucks. We do not have to pay it forward.

Instead, we can treat our users with kindness and empathy. And if we can’t manage that in a specific moment—maybe we’re having a bad day, we’re overwhelmed with something and this is one more thing—then I think it’s best to wait. Acknowledge their need, and get back to them when you can be kind and empathetic.

Which brings me briefly to one last thought based on a question Tim had of us panelists: how do you avoid fatigue and burnout? Because those lead to dealing with users without kindness and without empathy. Package maintainer-ship is mostly thankless. You rarely hear from the users who are just getting on with using the package successfully.

I can only answer this for myself, and hope it’s broadly applicable. I write software because I want to solve interesting problems. I want to write useful software in the process, so I write open source software. Built into the idea of open sourcing something is the idea that it could be useful to someone else. The fact that they’re trying to use my software is where I find meaning in what I do. Reminding myself of that helps.

Capturing the Eclipse in 2024

After my successful effort to capture the eclipse in 2017 I was hooked. I made plans to see the total eclipse of April 8, 2024 early. I figured I’d take my full astrophotography rig since it totality would be driving distance from my home.

That was until I went out to practice setting up during daylight. Getting good enough polar alignment to allow me to track the sun during daylight was doable, but it was somewhat frustrating. The thing I learned in 2017 was that the solar eclipse is not a photo opportunity, it’s a once-in-a-lifetime experience. I didn’t want to clutter the experience with the tedium of equipment setup and alignment.

What I optimized for was: keeping the photography simple so I can enjoy the experience of totality. I think I did this somewhat less intentionally in 2017, but that became an overriding concern for 2024.

A camera set up on a tracking mount to capture the solar eclipse
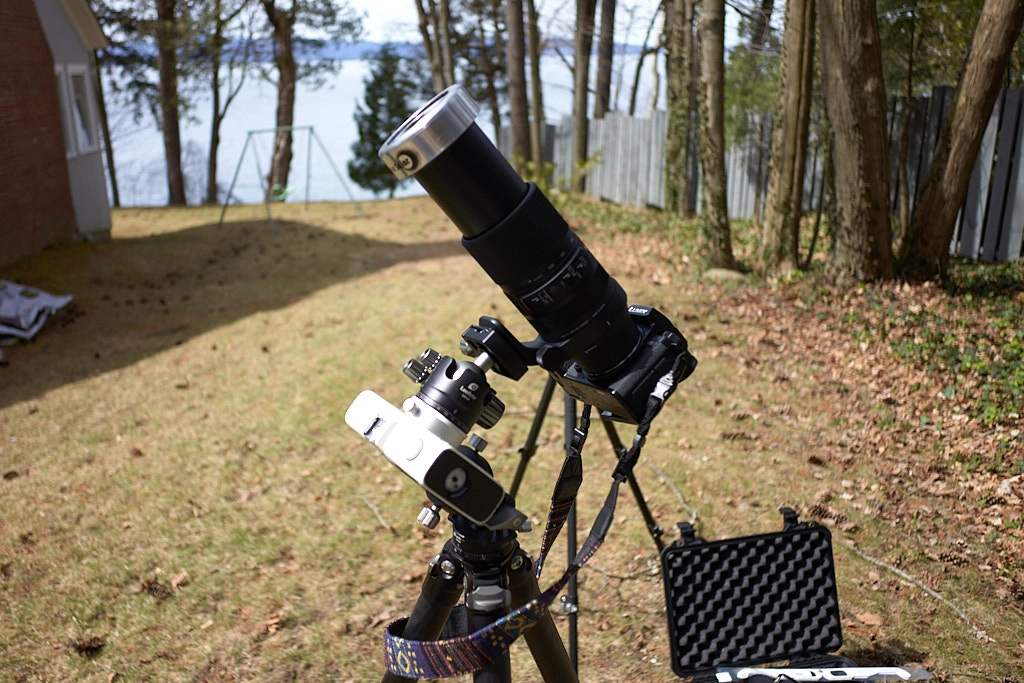
My S5II on the Vixen Polarie

So I fell back on my trusty Vixen Polarie, the little star tracker that could. This timeI used my Panasonic S5II, and Sigma 100-400mm F5-6.3 DG DN Contemporary lens. This is very similar to my setup in 2017.

One brief note on the Polarie and tracking mounts in general: I don’t think they’re required for eclipse photography per se, but they definitely help with the whole keeping the photography simple priority. Through a long lens the sun moves a lot in the sky over three minutes, which is how long totality in Shelburne, VT, lasted. A tracking mount removed, for me, the impulse to fiddle with the ballhead and reframe.

A view across Lake Champlain toward the Adirondack mountains where totality has ended
Adirondacks out of the shadow

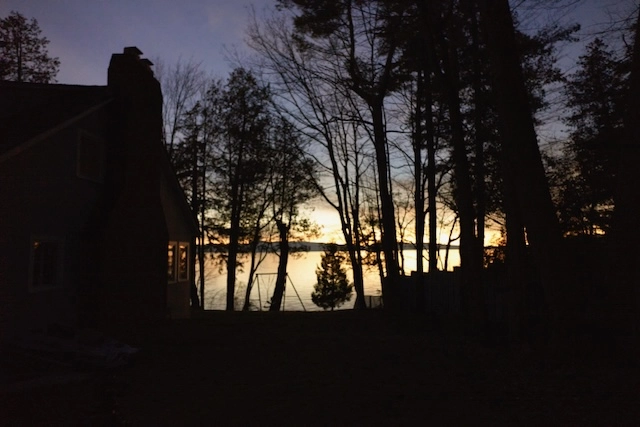
We picked a location in Shelburne, VT, on the shores of Lake Champlain for a weekend trip. It’s a lovely part of the country, but the Adirondacks across the lake were breathtaking. But never more so than while we were in totality, and I could look across the lake and see them emerging from the moon’s shadow.

For the actual photography, I stuck to my basic playbook from 2017, with a couple of minor changes: I wanted to stop down the lens to f/8 to maximize the sharpness and detail from the lens. To accommodate this and keep my exposures consistent with what I captured in 2017, I upped the ISO to 800 from 400. My Panasonic S5II has significantly better noise performance than my Fujifilm X-T2 did, so I wasn’t worry about any increase in noise.

PhenomenonShutter SpeedISOAperture
Chromosphere1/8000s8008
Prominences1/4000s8008
Corona 0.1 Rs1/1000s8008
Corona 0.2 Rs1/250s8008
Corona 0.5 Rs1/60s8008
Corona 1.0 Rs1/15s8008
Corona 2.0 Rs1/8s8008
Corona 4.0 Rs1/4s8008
Corona 8.0 Rs1s8008
Earthshine2s8008

After going through my data from 2017 I decided to target 1/1000s for any exposures of partiality. But I also decided that with a small field of view and no surrounding context, these images wouldn’t be particularly interesting to me. I don’t find these exposures from 2017 compelling. And I wasn’t interested in complicating my setup to capture more context. So, it’s okay if I only use those exposures to test the setup before totality.

Going through my checklist, I also considered external power supplies (extension cords, massive batteries, the like), but decided against it. These would be one more thing to set up, and one more thing to get right. Easiest just to make sure I have fully charged batteries for the camera and the Polarie.

⚠️ For any photography of the sun outside of totality itself a solar filter specifically designed for observing the sun is absolutely required. I keep seeing advice around the internet to just use ND filters. This is wrong and dangerous.

Here’s my checklist for 2024:

Before eclipse:

  1. Make sure camera battery is fully charged
  2. Make sure Polarie batteries are fully charged
  3. Set up tripod and Polarie
  4. Hook camera bag onto tripod for stabilizing weight
  5. Align tripod and Polarie to celestial north pole
  6. Put camera and lens on Polarie

Set up Camera

  1. Set camera to manual focus
  2. Set camera to manual exposure
  3. Set camera drive mode to self timer
  4. Set self timer drive mode option to 2s
  5. Set camera to exposure bracketing
  6. Set exposure bracketing to 7-1
  7. Set camera ISO to 800
  8. Set lens aperture to 8.0

Prepare for exposure

  1. Set Polarie to sun tracking
  2. Put solar filter on lens
  3. Position camera the sun
  4. Zoom lens to 400mm
  5. Focus the lens on the limb of the sun
  6. Put solar glasses on face
  7. Set initial shutter speed of 1/1000s

Partial eclipe

  1. Expose at 1/1000s
  2. Gawp
  3. Repeat as desired for stages of partiality

Totality

  1. Remove solar glasses from face
  2. Remove solar filter from lens
  3. Expose at 1/1000s
  4. Expose at 1/30s
  5. Expose at 1/2s
  6. Gawp
  7. Expose at 1/2s
  8. Expose at 1/30s
  9. Expose at 1/1000s
  10. Put solar filter on lens
  11. Put solar glasses on face
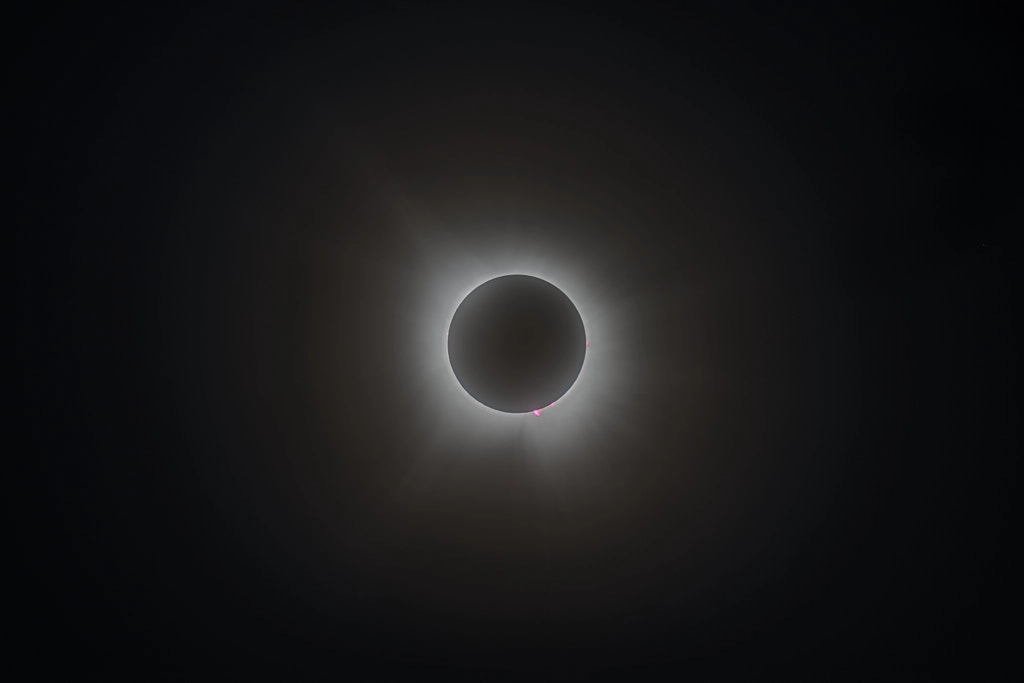
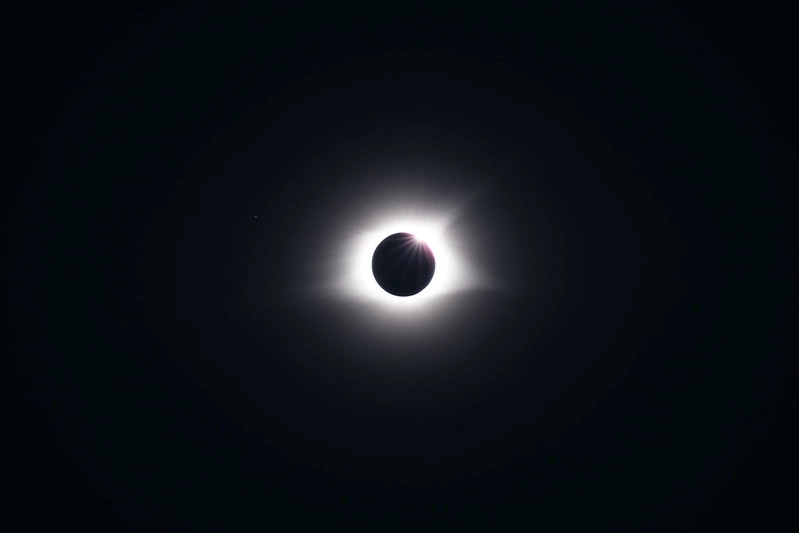
A solar eclipse
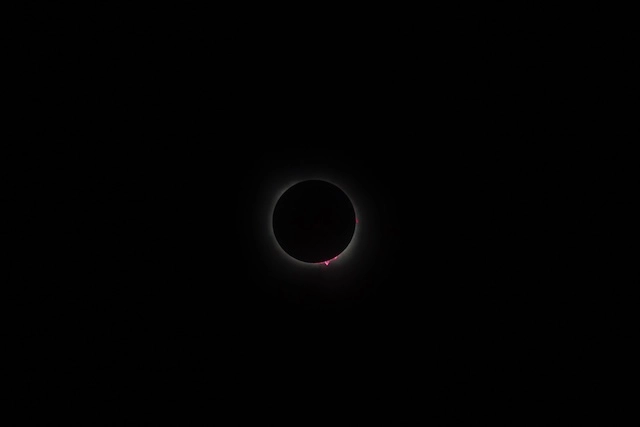
Prominences on the sun in a single 1/8000s exposure

2017 was a year in which the sun was at a low point in its solar cycle — this year was very different, and that was almost immediately apparent. There were massive prominences visible to the naked eye on the lower limb! This was shocking to me, wholly unexpected in the midst of an altogether unusual experience.

And because I kept it relatively simple, I was able to capture it to my satisfaction, achieve my array of exposures, and have plenty of time to take in the full experience of being present in the world under the shadow.

I composited 2024 differently than 2017; in 2017 I was struck by the visibility of the bright star Regulus in the frame with the sun, and that’s what I wanted to highlight with my editing — that star visible during the day while our star was obscured. This time it was that set of prominences that I wanted to highlight.

And here’s the result:

A solar eclipse
Composite of the total eclipse of April 2024

I’m already planning 2026.

I hadn’t had opportunities to observe a total solar eclipse before 2017, but I knew I wanted to try my hand at photographing it. And photograph it I did!

Before that though, I did some research and captured notes and a simple, fine-grained order of operations, because I didn’t know what I was doing and it’s not something you can really try over again if you fail. Plus, I actually wanted to enjoy the moment without fiddling with my camera, and having a concrete plan helps with that.

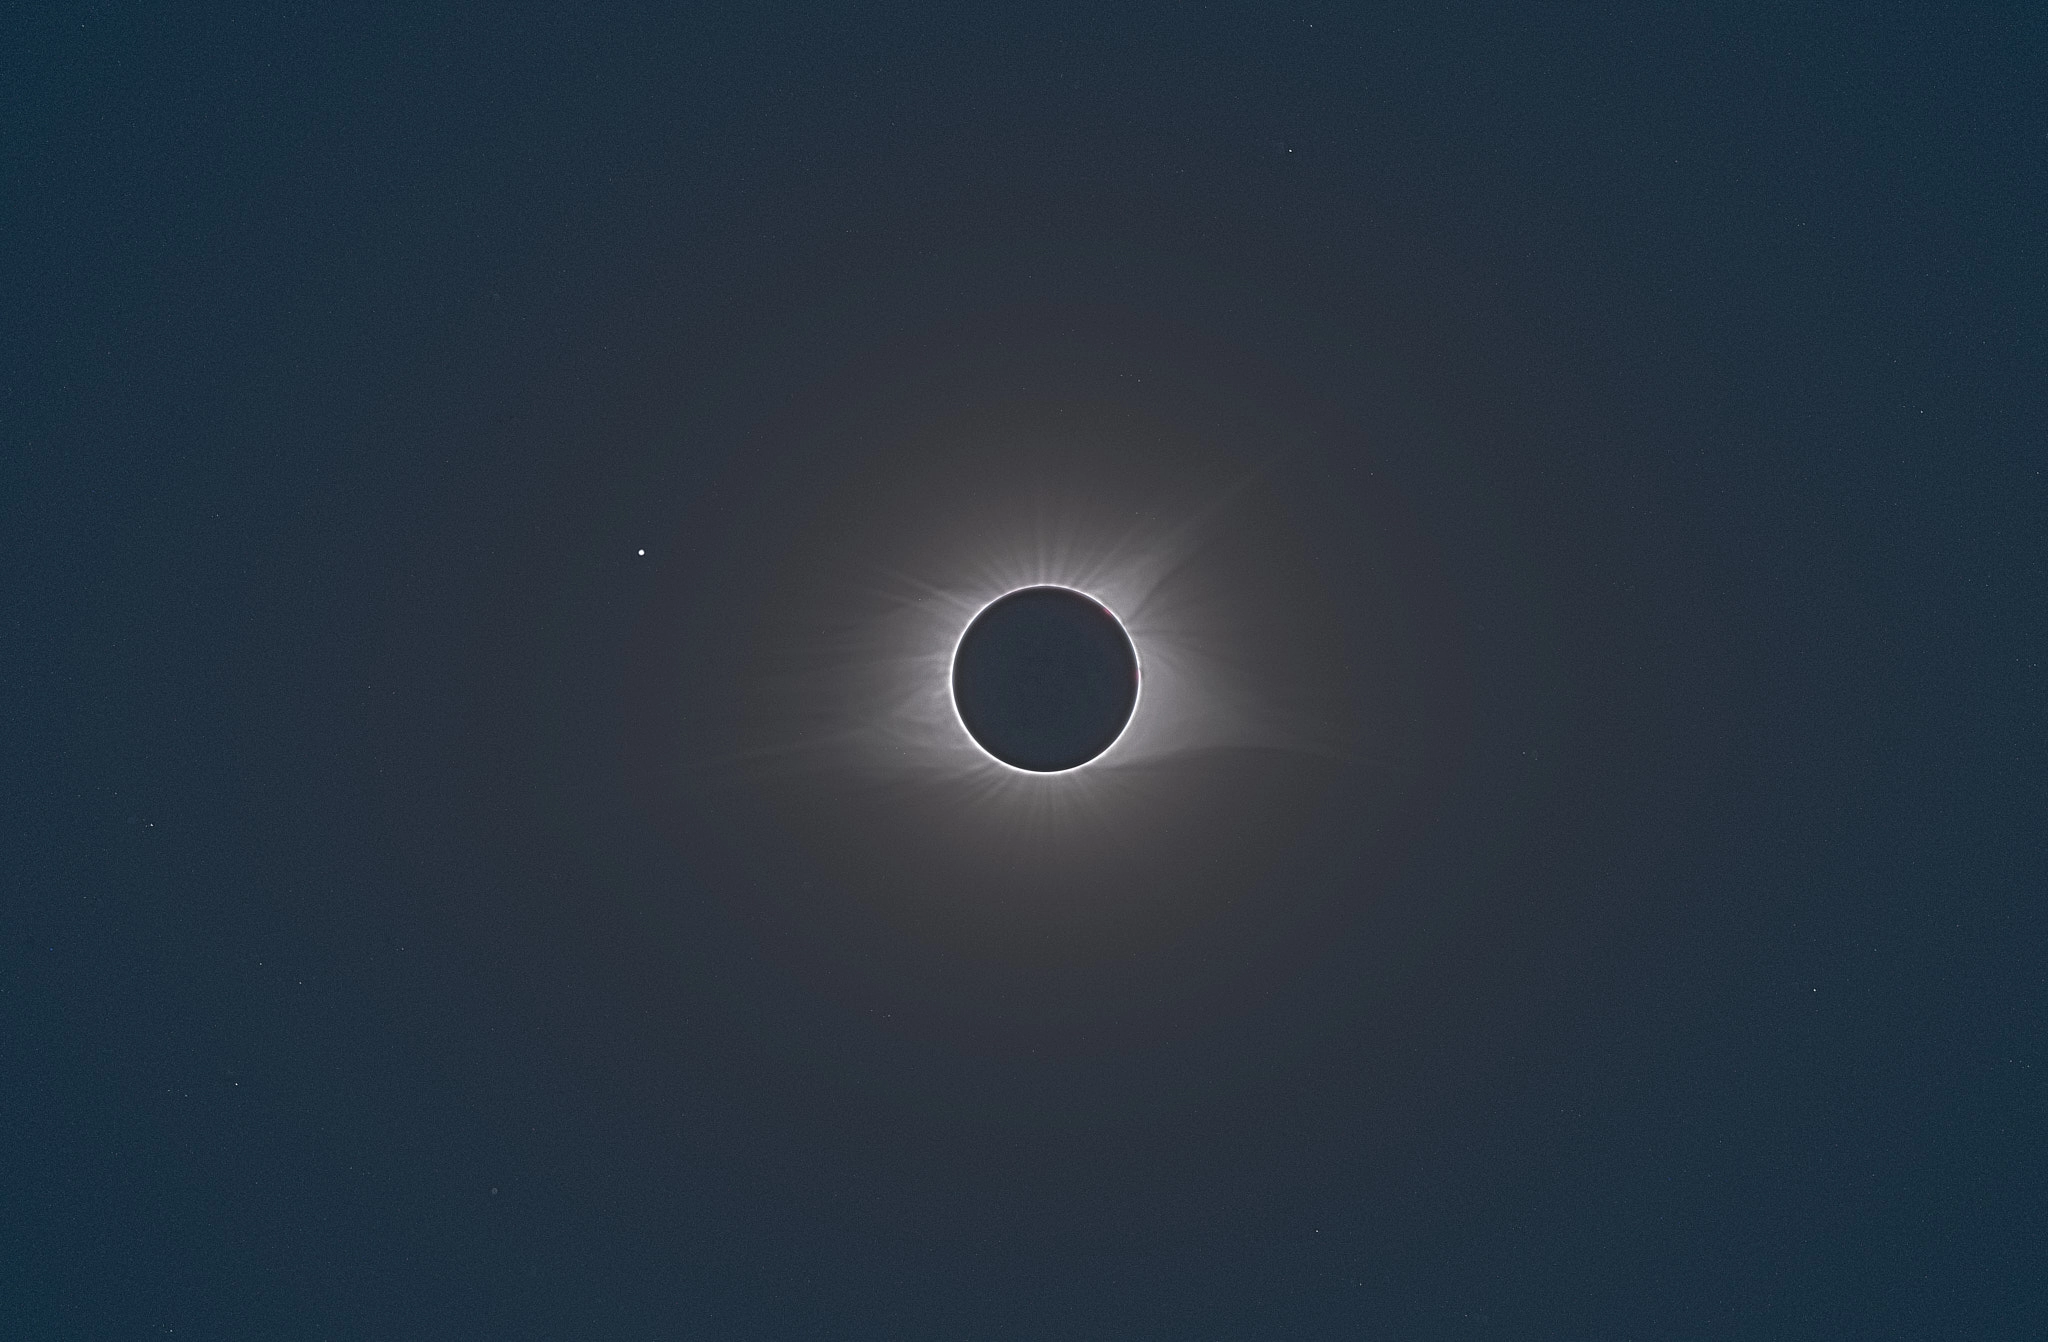
A solar eclipse
Composite of the total eclipse of August 2017

There are a few different images I wanted to try to capture, because there are multiple aspects of the sun that are visible during an eclipse that aren’t normally. In brief, we can observe the sun’s chromosphere, any prominences it might have in the moment, the corona, and, at totality, we can see earthshine on the moon. These can all be composited together to form an image like the one above.

For this eclipse, I was traveling with my tripod, Polarie tracking mount, and Fujifilm X-T2 and 100-400 lens, so figuring out the exposures for each of these phenomenon would happen in terms of the ISO+shutter speed+aperture settings best for that combination of equipment. Jerry Lodriguss has a fantastic write-up that forms of the basis of what I decided to do.

Based on this I settled on using an ISO of 400, an aperture of 5.6 (the widest that lens was at 400mm), and chose shutter speeds from there.

PhenomenonShutter SpeedISOAperture
Chromosphere1/8000s4005.6
Prominences1/4000s4005.6
Corona 0.1 Rs1/1000s4005.6
Corona 0.2 Rs1/250s4005.6
Corona 0.5 Rs1/60s4005.6
Corona 1.0 Rs1/15s4005.6
Corona 2.0 Rs1/8s4005.6
Corona 4.0 Rs1/4s4005.6
Corona 8.0 Rs1s4005.6
Earthshine2s4005.6

This became my sequencing for during the eclipse: I would take an exposure at 1/8000s, then 1/4000s, 1/1000s, etc, all the way up to 2s, then do the same in reverse, from 2s down to 1/8000s. To eliminate the number of things that could go wrong, I decided to manually set the shutter speed (with the X-T2’s physical dial, perfect for this use-case) rather than relying on any automation.

The other decision I made was to use exposure bracketing in camera at ±1 stop. So, I would set the shutter speed above, and the camera would take 3 exposures. This wold maximize the range of possible data I’d have to work with.

I also wanted to get some photos before totality as the moon is moving across the sun’s face. For those there’s a lot more time to experiment.

⚠️ For any photography of the sun outside of totality itself a solar filter specifically designed for observing the sun is absolutely required. I keep seeing advice around the internet to just use ND filters. This is wrong and dangerous.

The core decision I stuck to here was just to follow the same exposure list, with bracketing, I had for totality. Again, this gives me a maximum range of exposure data and is an opportunity to practice.

As I said at the beginning of this post, what I wanted was a straight-forward, fine-grained order of operations I could follow on the day to ensure I was spending as little time as possible fiddling with my camera, and the most time enjoying the experience of the eclipse with my family. Here is the list I ended up with:

Before totality:

  1. Put new batteries in Polarie
  2. Set up tripod and Polarie
  3. Align Polarie
  4. Put new battery in camera
  5. Put camera and lens on Polarie
  6. Put solar filter on lens
  7. Attach cable release
  8. Set manual focus
  9. Set ISO 400
  10. Set BKT drive mode
  11. Set 5.6 aperture
  12. Put solar glasses on face
  13. Position on sun
  14. Focus
  15. Set shutter speed 8000

Partiality:

  1. 8000
  2. 4000
  3. 1000
  4. 250
  5. 60
  6. 15
  7. 8
  8. 4
  9. 1s
  10. 2s
  11. Repeat as desired

Totality:

  1. Remove solar filter
  2. 8000
  3. 4000
  4. 1000
  5. 250
  6. 60
  7. 15
  8. 8
  9. 4
  10. 1s
  11. 2s
  12. Gawp
  13. 1s
  14. 4
  15. 5
  16. 15
  17. 60
  18. 250
  19. 1000
  20. 4000
  21. 8000
  22. Put solar filter on lens

Overall, this made for a satisfying and enjoyable eclipse, with results I’m pleased with. I did knock the manual focus ring on the lens slightly out of focus when removing the solar filter for totality, and so my totality shots are that little bit out of focus. But that’s fine. Other people got sharp, in focus photos of this eclipse. But this is mine, where I was, and with my family as we observed it.

First new light with an new(ish) setup

I wrote about my return to using my German Equatorial Mount, refractor, and Canon DSLR in my last blog post. Since then I’ve refreshed both my mount and my reactor. In many way’s it’s the opposite of the lightweight setup I wanted a year ago, but what I realized I wanted was simpliciy. This gives me that, of a sort:

  • Losmandy GM-8 German equatorial mount with Gemini 2
  • Astro-Tech AT115EDT 115mm ED triplet refractor with 0.8x reducer/field flattener

The Losmandy mount is substantially heavier (even with their lightweight tripod) than anything I’ve used before. But it’s modular, comes apart easily, and is—in my experience so far—rock solid, feature rich, and a joy to operate.

The same can be said for the 115mm refractor, it is much heavier than my ED80, but what I gain for the added weight is a faster optic (f/5.6 with the reducer) with a larger aperture that can capture more in less time.

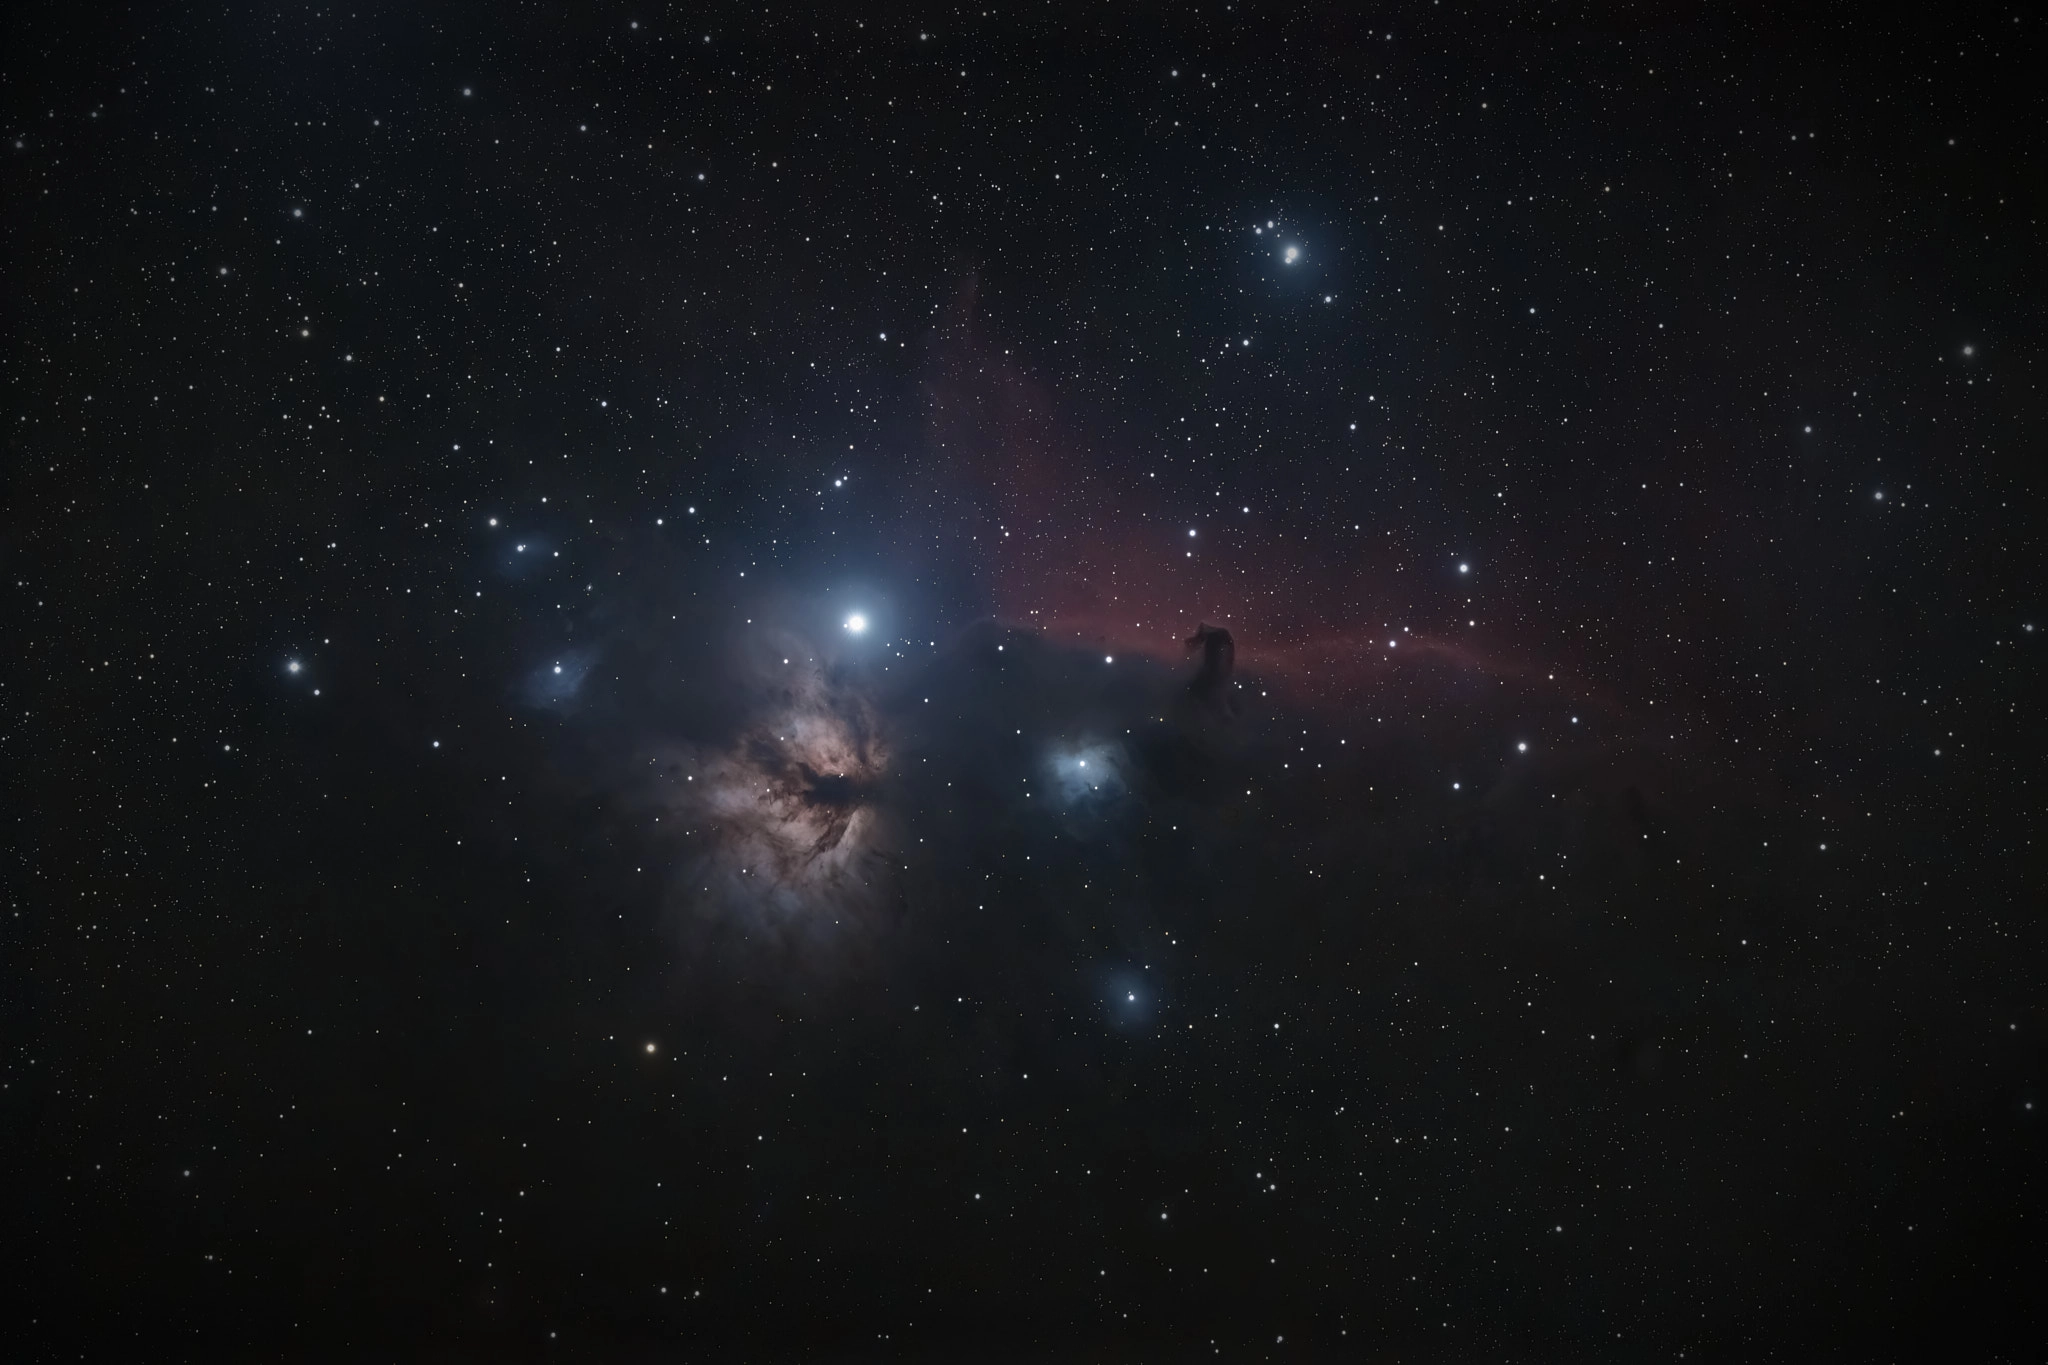
My first light with this setup was actually limited. I got 30 minutes of the Horsehead and Flame nebulas before they went behind a tree and clouds rolled in:

The Horsehead and Flame nebulas
The Flame nebula and the Horsehead nebula. 30x60s, Canon 6D Mark II, Astro-Tech AT115EDT, 0.8 focal reducer. {% end %}

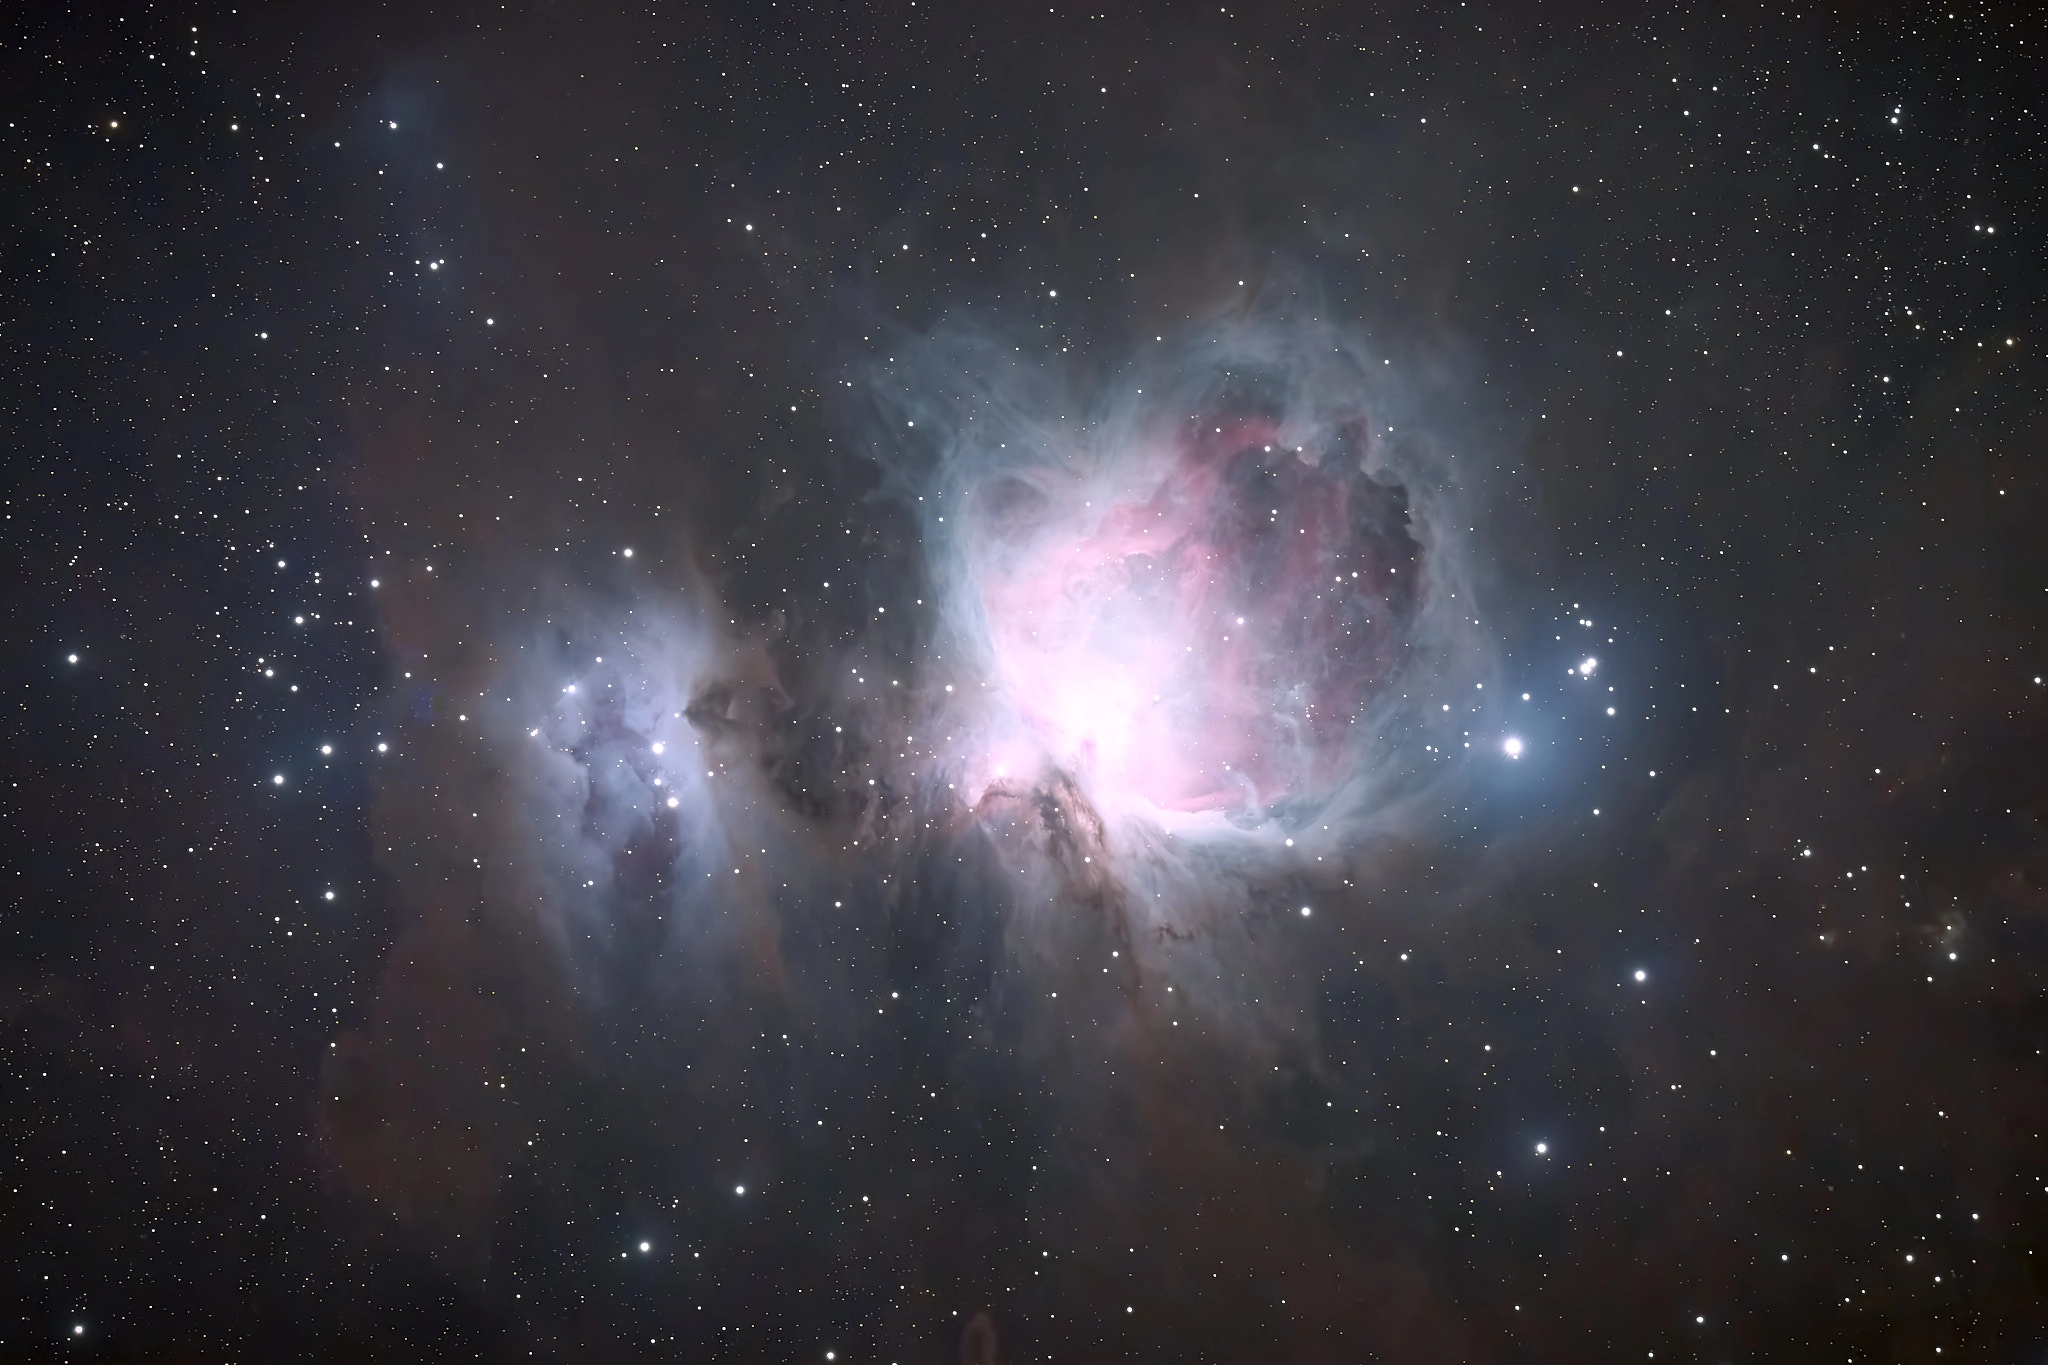
Shortly after that I got to capture a 1:23 of the Orion nebula over a couple nights:

The Orion Nebula
The Great Nebula in Orion. 83x60s, Canon 6D Mark II, Astro-Tech AT115EDT, 0.8 focal reducer. {% end %}

I’ve had no complaints, no struggles, nothing so far with the mount — it is an utter joy to use. And because it’s upgradable, it could be the last mount I’ll ever own. I’m not sure I’d ever need to upgrade — I don’t anticipate putting anything on it heavier than the AT115EDT at present.

The AT115EDT is a beautiful telescope, with superb optics. I will say, figuring out that the camera rotator actually was two pieces, and you have to take one off to attach the reducer/flattener was a bit frustrating. But that’s a minor, one-time thing.

Look for more from this setup in the future.

First new light with an old(ish) setup

After my experiments with a lighterweight astrophotography setup ended in a bit of failure, I’ve gone back to a fairly tried-and-true setup for myself:

  • Orion SkyViewPro computerized German Equatorial Mount
  • Orion ED80 APO 80mm refractor
  • Orion StarShoot Autoguider
  • Sky-Watcher 0.85 focal reducer for ED80

I’ve been able to control the telescope and autoguider from a computer (both using laptop and a Raspberry Pi attached to the telescope), but where I’ve struggled in the recent past is in controlling my Fujifilm cameras from that same computer. I would usually use the built-in interval timer separately on the camera.

This has a few disadavantages, first that I can’t check progress, tracking, whether any obstructions have gotten into the frame, etc while the timer is running. Before I switched to Fujifilm cameras, I would use BackyardEOS with my Canon DSLR to control my exposures. It had the added bonus of being able to use the laptop screen to frame, preview, and focus, which works much better than the back screen on any camera.

So, what I decided to do was pick up a second-hand Canon 6D Mark II to dedicate to astrophotography and go back to using BackyardEOS. A dedicated camera I can also get modified for Hydrogen-alpha. This made me happy.

So, I tried to take some photos of a couple easy targets this time of year to see how things go:

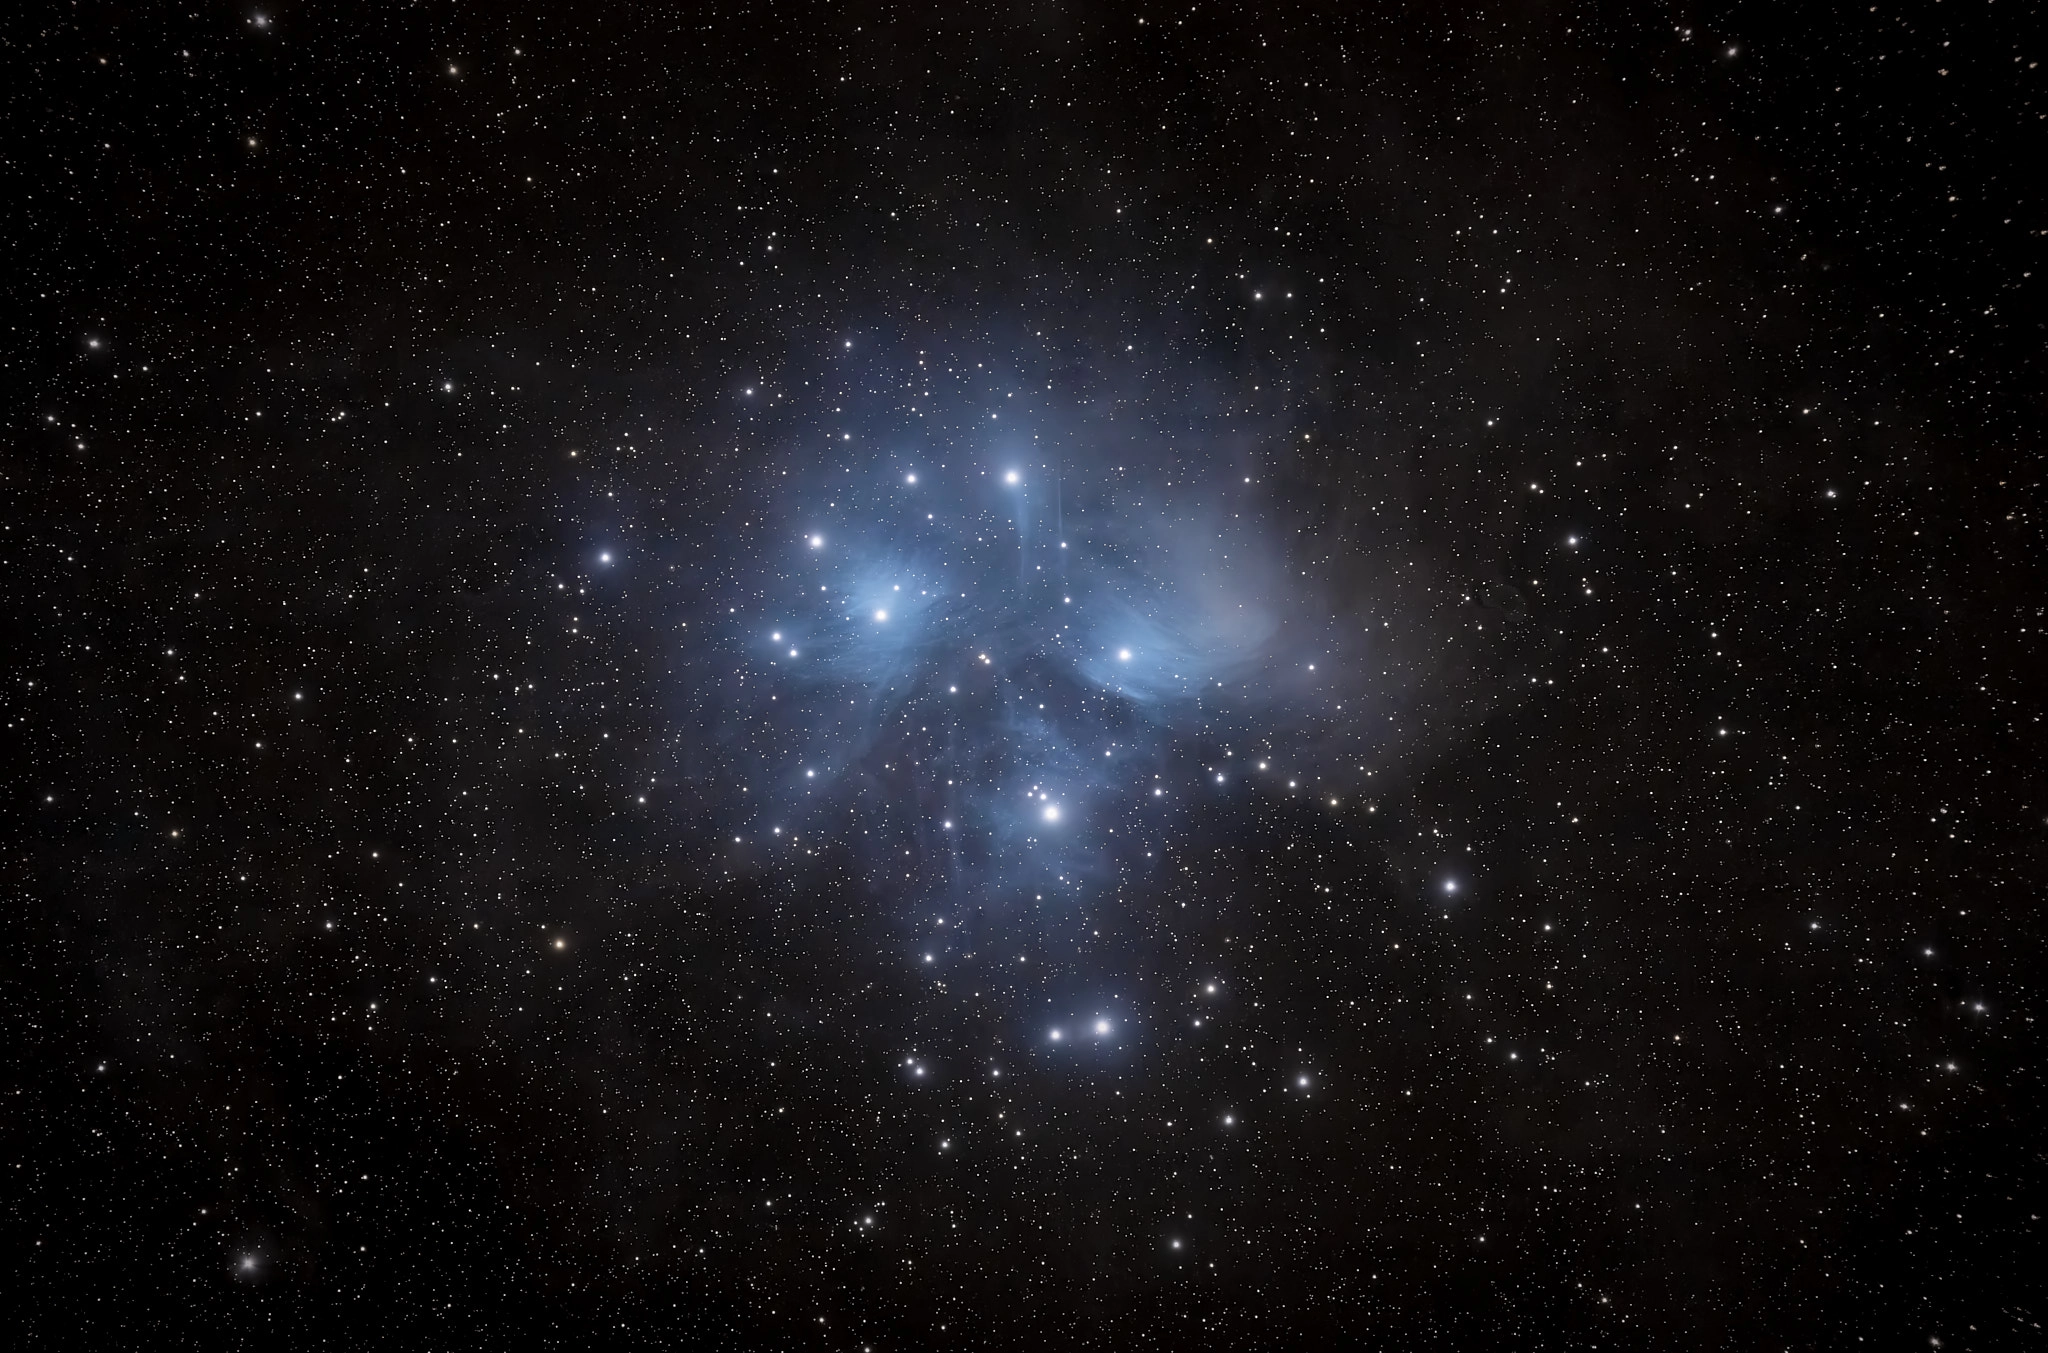
The Pleiades
The blue whispies of the Pleiades. 60x60s, Canon 6D Mark II, Orion ED80, 0.85 focal reducer.
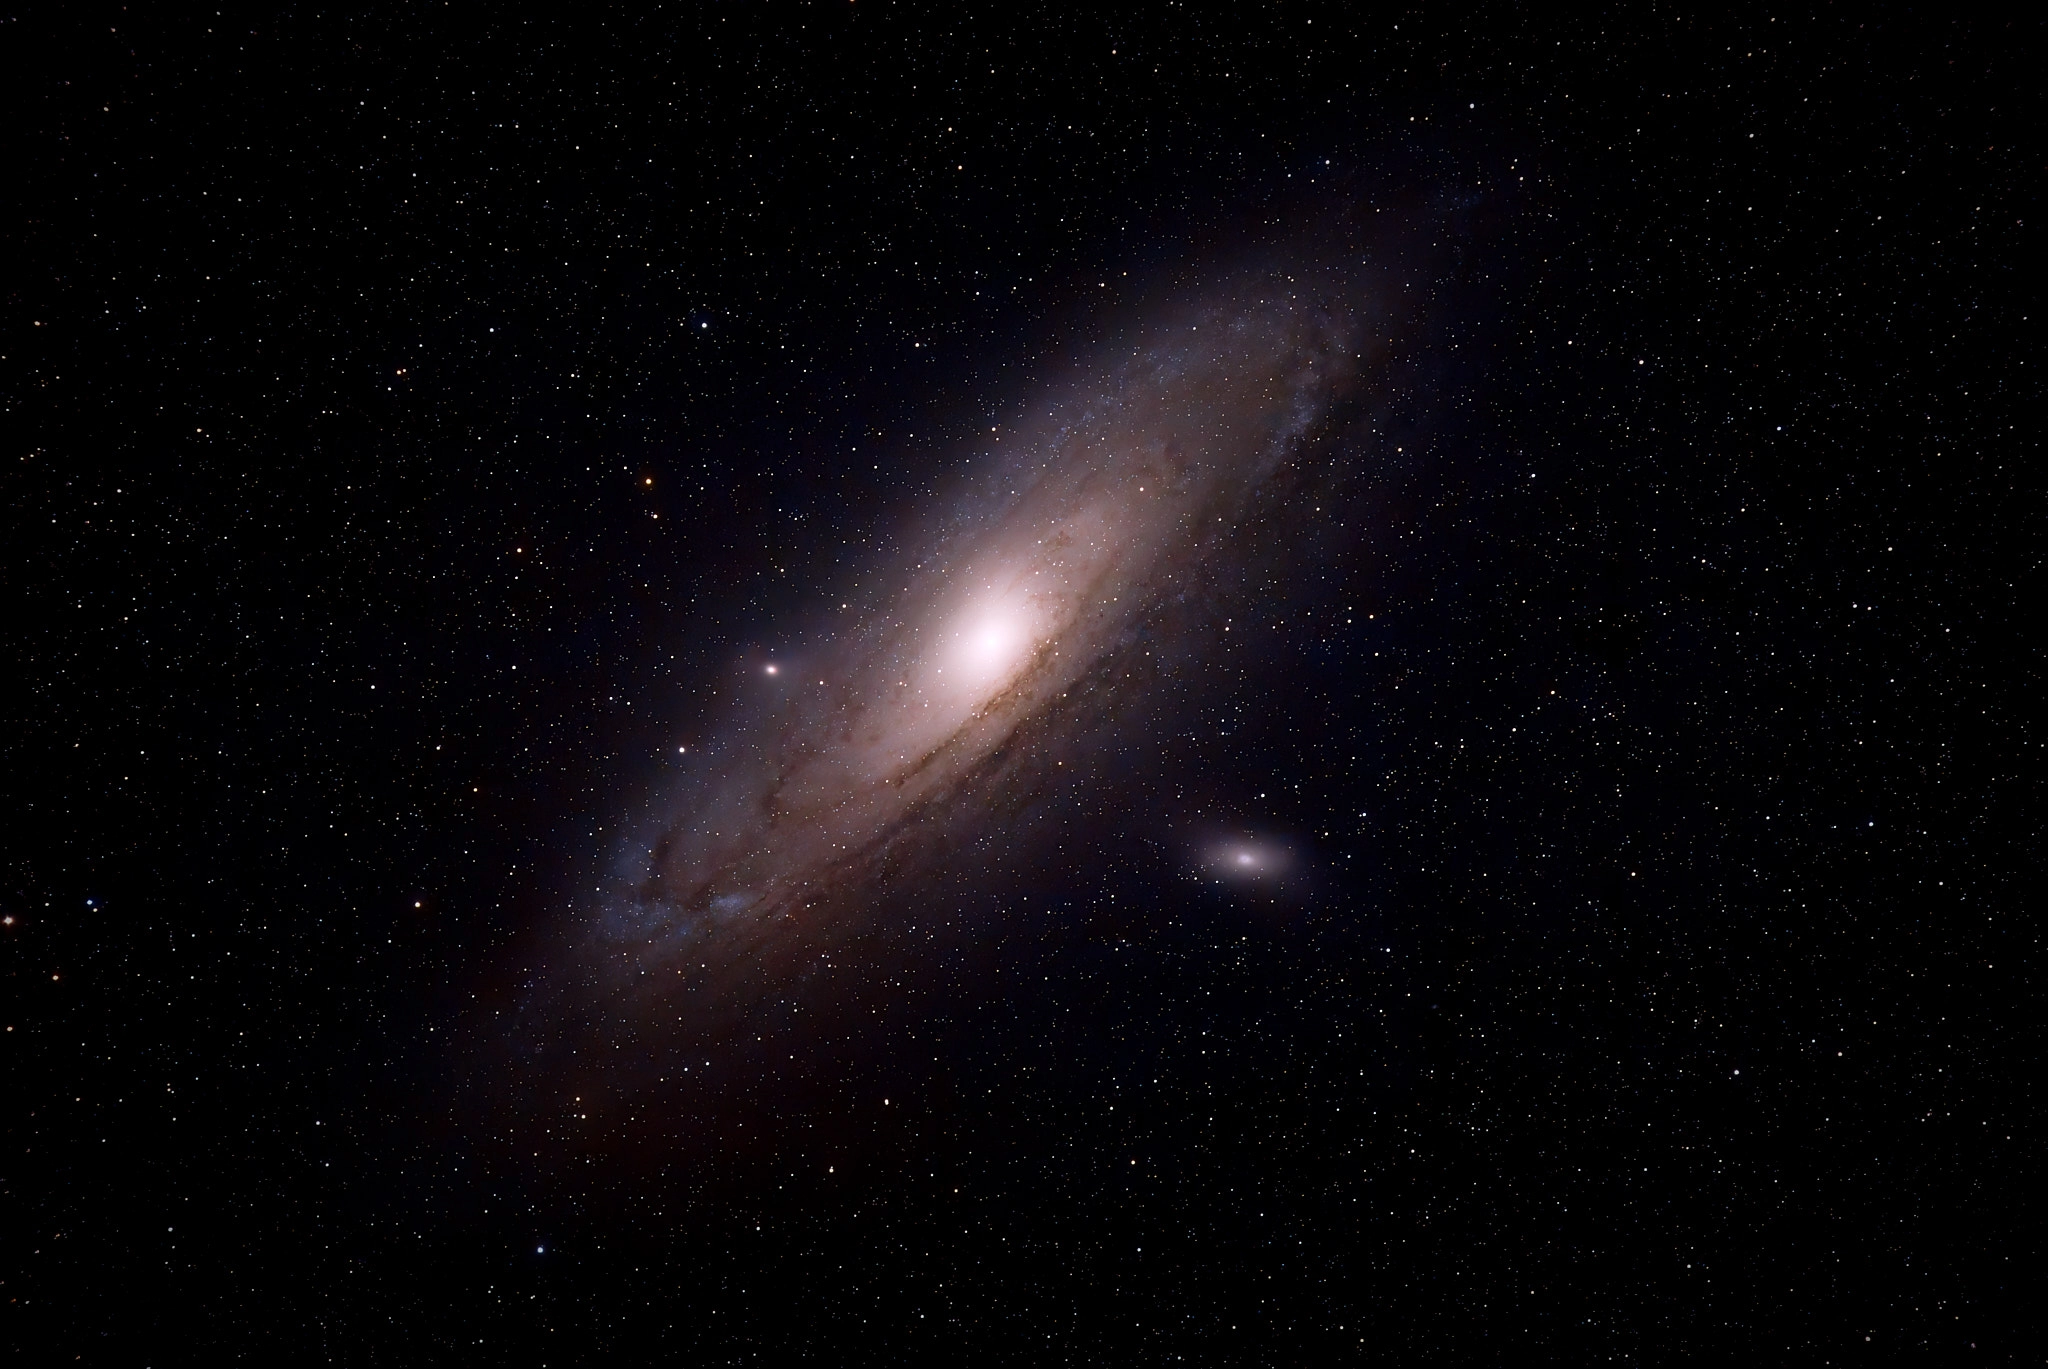
Andromeda
The Great Galaxy in Andromeda. 26x60s, Canon 6D Mark II, Orion ED80, 0.85 focal reducer.

Things went well.

The software stack I’m using is, in macOS, PHD2 for autoguiding and SkySafari 6 Pro for controling the telescope; in a Windows VM, BackyardEOS, set up to drizzle with PHD2. For post-processing I’m using Siril and then importing into Capture One for my regular photo workflow.

This worked really well. I have some new targets in mind for the next clear night.

I wrote earlier this year that my biggest blocker to regularly engaging with my astrophotography hobby is:

[A] fundamental laziness I have when it comes to setting up and taking down my equipment. This is the biggest blocker I find to just getting out and doing.

This inspired me to rethink: what if I assembled a lighter-weight, more portable, less cumbersome astrophotography setup using my (beefy, carbon fiber) camera tripod, a polar mount (first the Vixen Polarie I’ve had for a while, then the iOptron SkyGuider Pro), maybe throw my autoguider on there, and hey presto! A setup that should be less effort to set up and take down on a little more of a whim, that I could set up and carry out whole. Or that was the theory.

What I’ve found in practice is that… it doesn’t solve the problem I set out to solve: my laziness. This is why I haven’t updated this series with any resulting photos yet, or attempts to travel, or just generally anything. The setup just doesn’t work for me. This isn’t to say it won’t work for someone else, but I’m more used to the conveniences of a computerized German Equatorial Mount workflow, where I can have software do a lot of the work for me.

I’ve thought about putting in a permanent pier, so that I don’t have to mess around as much with the tripod and mount alignment

This might be where I’m going next. Stay tuned.

After considering my mount as part of my lightweight re-think of my astrophotography setup, I need to consider my optical and imaging setup. Currently I use an Orion ED80 f/7.5 refractor. The ED80 has a focal length of 600mm, and weighs 2.6kg. To this I add a 0.85 focal reducer/corrector that adds 320g and reduces the focal length to 510mm.

Over the past several years I’ve imaged with APS-C Canon DSLRs and Fujifilm mirrorless cameras, most recently the Fujifilm X-T4, which weights 607g with a battery. I won’t be changing the camera itself, but it’s worth including it in both setups.

Original setupWeight
Orion ED80 Apochromatic2.6kg
0.85 Focal Reducer/Corrector320g
Fujifilm X-T4607g

With the camera, this setup had a total weight of about 3.6kg, which… could actually work with the iOptron SkyGuider Pro, theoretically. But our point here is to find a lightweight alternative to the telescope, which is going to be camera lenses!

The closest I can get to that 510mm focal length of the ED80 + 0.85 reducer is the Fujifilm XF 100-400 lens, which I have, and which I used to capture the 2017 total eclipse. That lens weighs a whopping (for something intended for hand-holding) 1.77kg! An alternative, lighterweight lens is the more recent XF 70-300mm, which is a measely 580g. That’s more like it. Both are faster too, with f-stops of f/5.6 at their maximum focal length, compared with the ED80’s f/7.5.

A solar eclipse
Composite of the total eclipse of August 2017

Both of these lenses are also compatible with the Fujifilm 2x teleconverter, which would add 170g to each, but would give me focal lengths of 800mm and 600mm, respectively, at a cost of an f-stop of f/11. When I already have to do long exposures, this might be a bit much. However, because I have that flexibility, I’ll include the teleconverter in the table below.

Lightweight setupWeight
Fujifilm XF 100-400mm f/4.5-5.6 R LM OIS WR1.77kg
Fujifilm XF 70-300mm f/4-5.6 R LM OIS WR580g
Fujifilm XF 2X TC WR170g
Fujifilm X-T4607g

This gives me the following possible combination and weights:

Lightweight combinationsWeight
XT-4 + XF 100-400mm2.38kg
XT-4 + XF 100-400mm + 2x TC2.55kg
XT-4 + XF 70-300mm1.19kg
XT-4 + XF 70-300mm + 2x TC1.36kg

So, the X-T4 with the 100-400 and the 2x TC is still about 2/3 of the total weight of my original setup. But a setup with the 70-300 is less than half the weight of just the ED80! And in my own (non-astrophotographic) testing, the 70-300mm lens is close enough in image quality to the 100-400 that the extra weight isn’t worth it unless I need the reach.

I mentioned above that I used the XF 100-400 for the 2017 total eclipse. In that case, I used a Fujifilm X-T2 and XF 100-400 on a tripod. That experience highlights a downside to this setup when compared with a telescope: I knocked the 100-400 slightly out-of-focus when taking the sequence of exposures I wanted for stacking. That wouldn’t have happened with the ED80, where focus can be locked once obtained.

A solar eclipse
Composite of the total eclipse of August 2017

However, the major reason I used the X-T2 and XF 100-400 for the eclipse was that I had to travel to see it. That experience already speaks to the advantage I’m trying to get out of a more thought-out lightweight setup.

Besides focus locking, there are some other downsides to a camera lens vs a telescope. Most camera lenses are optically best when stopped down from their maximum aperture, whereas telescopes are optimized at their fixed aperture. I also suspect there’s also a difference in light transmission between a doublet or triplet refractor and a camera lens with more glass and coatings in the optical path.

But, I’d like see what this looks like with some serious attempts at use, and whether camera lenses are good enough for what I want to capture, of if I need to look at a small, lightweight, dedicated refractor.

The first part of my lightweight re-think of my astrophotography setup has to be my mount. I’ve been using an Orion SkyView Pro GoTo. It’s been a good little, reasonably lightweight (as decent goto mounts go), and has done the job well — I haven’t felt it incapable of what I needed. The mount, counterweight, and tripod weigh around 17kg total when set up, and have a maximum capacity of 15kg. 17kg is… not insignificant.

Original setupWeightCapacity
Orion SkyView Pro GoTo and tripod17kg15kg

I’m also a photographer, and to be sure there’s a lot more innovation in the photographic tripod space in terms of materials and features. And I have tripods and accessories. So, I thought I’d see what I could come up with.

I picked up a nice, beefy Leofoto carbon fiber tripod, leveling base (which, coming from a telescope tripod, is revolutionary), and a two-way pan head to make it easy to set-and-forget my home latitude. I already have a Vixen Polarie tracking mount for a number of years that can sit on top of this and track the rotation of the Earth. I have not used it for much more than quick-and-dirty throw-a-camera-on-it efforts up until now though. On that I’ll put the ball head that came with the tripod.

So, what is the weight and capacity of all of this?

Lightweight setupWeightCapacity
Leofoto LS-364C tripod1.77kg25kg
Leofoto LB-60N leveling base28g15kg
Leofoto VH-30R two-way panning head422g15kg
Vixen Polarie953g3.2kg
Leofoto LH-40 ball head496g20kg

This gives me a total weight of 3.67kg with a maximum capacity of 3.2kg (the limitation of the Polarie). About 500g of that is taken by the ball head.

Listed out, like above, , this looks more complicated than the previous setup, but I can keep certain bits assembled. More importantly, with the leveling base, I can assemble everything from the ground the Polarie inside, well before I go out a cold night. Then, when I carry it out, all I have to do is level the base, align the Polarie, attach the ball head and camera and start capturing. In theory.

I’d like to eventually replace the Polarie with an iOptron SkyGuider Pro, which weighs 4.6kg (and would therefore add 3.6kg of weight), but has a 5kg capacity. The big features it adds will be a counterweight and autoguider support (more on that later). 5kg is still only a third of the 15kg capacity of the telescope mount, but I haven’t needed anywhere close to that 15kg capacity for my telescope and imaging setup.

But the imaging setup will be another post!

Astrophotography has been an off/on hobby of mine for almost twenty years. In that time I’ve taken a few images a really like, and many I don’t. Typically I go through periods of enthusiasm and frustration, both with gear, weather, and my own limitations.

One thing that does recur is a fundamental laziness I have when it comes to setting up and taking down my equipment. This is the biggest blocker I find to just getting out and doing. I’ve thought about putting in a permanent pier, so that I don’t have to mess around as much with the tripod and mount alignment, but that’s not the only problem I have. It’s also somewhat hard to travel with my setup. I downsized about 10 years ago from an 8” Schmidt-Cassegrain to an 80mm refractor, and that helped, but given how I frequently I’ve gone out over the past few years, I thought it might be time again.

I want to rethink my setup, from my mount to the optics and imaging to the possibility of autoguiding and other niceties. Most importantly I want to be satisfied with both the level of effort involved in setup, when compared to imaging and processing, and I want to be satisfied with the quality of the images.

I’ll explore options and comparisons over a series of posts, and try to reason out what works along with what I already have — afterall, budget is a big factor, and I’m already a photographer who has a lot of equipment that could work anyway. But most of all, the test will be whether I actually get out and take astrophotos again.

After all, I’ve gotten great results with just a camera and a lens before.

Andromeda
The Great Galaxy in Andromeda. 22x15s, Fujifilm X-T2, XF 100-400mm.